Today Windows Forms and WPF was made open source, and it now allows you to easier poke around the code, submit fixes and improvements etc. But how do you actually get set up to building your own custom version of Windows Forms and using it in your own application? Here’s a step-by-step approach to that. (The same steps more or less applies to the WPF as repo as well, but at the time of writing this WPF doesn’t have much code shared yet)
Note though: I don’t recommend customizing and using your own Forms version, as forking leads to quickly getting behind the releases, but it’s useful for testing any PRs you might be working on.
Prerequisites:
First install the latest .NET Core 3.0 Preview SDK. If you’re using VS2019 Preview, you’re now good to go. However if you’re using VS2017, then after installation completes, open up Visual Studio settings, and make sure the “Use previews of .NET Core SDK” under “Projects and Solutions –> .NET Core” is turned on.
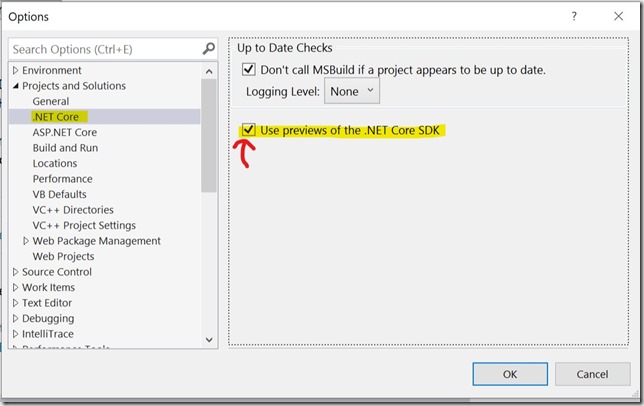
If you don’t do this, you’ll start getting build errors when building .NET Core 3.0 preview apps saying “The current .NET SDK does not support targeting .NET Core 3.0. Either target .NET Core 2.1 or lower, or use a version of the .NET SDK that supports .NET Core 3.0”.

Building WinForms
The first step is to clone the repo. Use your favorite git tool or clone from commandline using “git clone https://github.com/dotnet/winforms” . Alternatively just download the zip from github and unzip it.
You can now open the “System.Windows.Forms.sln” solution in the root folder. You should see all the source code for forms in the System.Windows.Forms project. Most of the code you care about in there is probably in the System\Windows\Forms folder. Feel free to make some tweaks to the code just for fun. Or go crazy and even add your own new control 
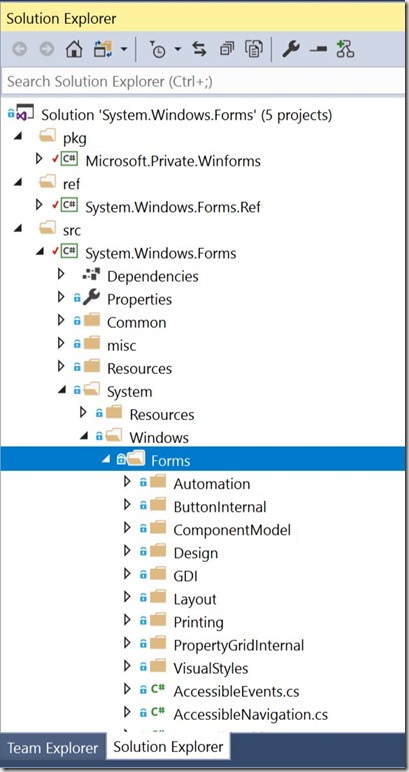
However if you add any new classes or members, you’ll also have to go add the same members to the System.Windows.Forms.Ref project in the ‘System.Windows.Forms.cs’. These are just stubs and you can follow the pattern of the other classes to see how it’s done. If you don’t so this, you won’t be able to use the new APIs you’ve added, as this project generates the reference assembly you compile against (while the main one is the one you run against).
Once you’re happy with your custom Windows Forms solution, right-click the “Microsoft.Private.Winforms” project and select “Pack”. Note: If you just compiled everything, this doesn’t do anything – the pack operation only seem to work if there’s also something new to compile (VS bug?), so usually I just quickly touch a file and undo the change to trigger a new compilation.
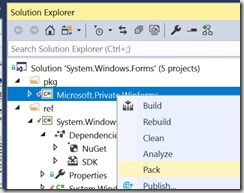
You can also build and pack from commandline. Browse to the root of the repo, and enter “build –pack” to generate the nuget package with your custom build. Also I encourage you to read the Building Guidelines for more information regarding building Windows Forms.
You should see something like this in the output, including a path to the .nupkg file generated. Make note of this path, as we’ll need it later.

Note: An alternative to packing things up as a nuget package, is to simply use this repo a submodule. In that case all you’d need to do is add the main System.Windows.Forms project to your project, and add a project reference.
Creating our first app with a custom Forms build
Now to use this new build: Open a command prompt and go to a new empty folder. Then enter “dotnet new winforms”. This would generate a new winforms project, with a .csproj file that you can open in Visual Studio.
Open the project and in the Visual Studio options, navigate to “Nuget Package Manager –> Package Sources”, and add a new package source that points to the \artifacts\packages\debug\shipping\ folder you noted above:
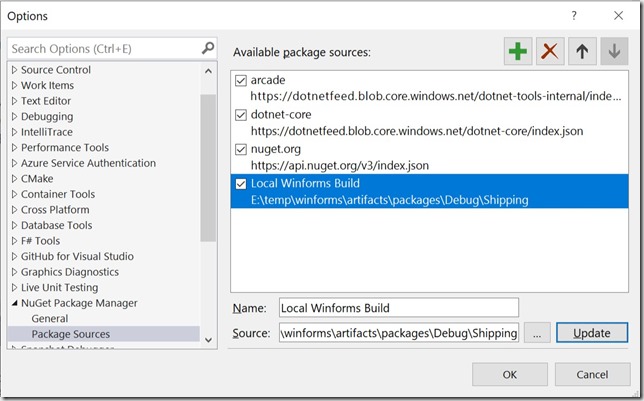
You can now go into the nuget references, and add the nuget package you created:
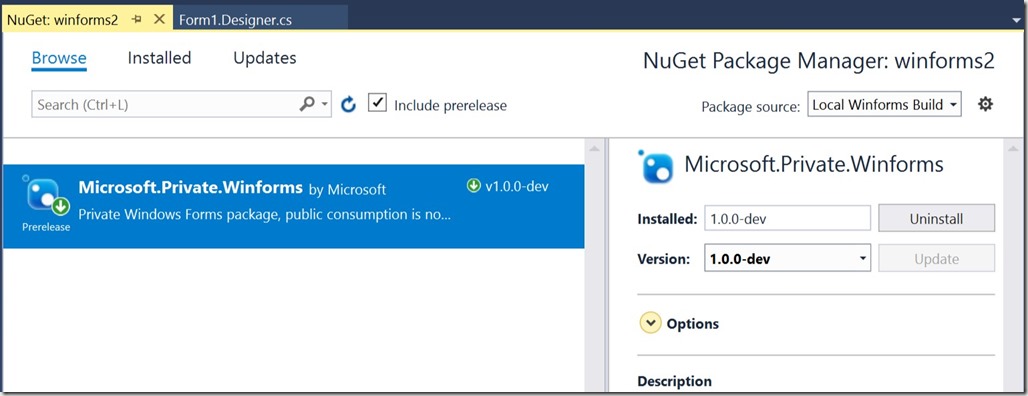
And voila! You’re now set up to build a WinForms app that’s running on your very own WinForms version.
Here displayed with my very own very important addition to WinForms (PR pending  ):
):
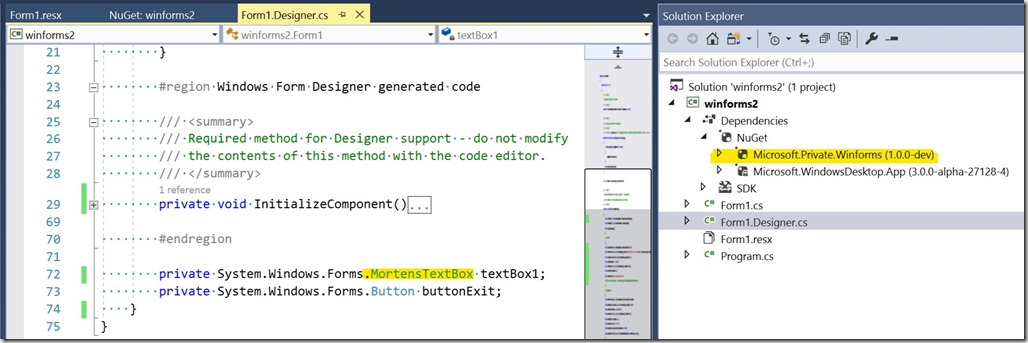
Word of caution with this nuget package: If you go back and make more changes to your WinForms project and create a new nuget package, make sure you clear out the package from your NuGet cache, or you won’t see any of the changes, as the newly generated nuget package will have the same ID and Version, and the cache would just kick in and pull from there instead. But if you’re using a fork, you can also add NerdBank.GitVersioning to the project to get auto versions which will update the package ID with each commit.
The alternative is to use the submodule / project reference approach mentioned above which avoids the caching issue.
Thank you to Oren Novotny for reviewing this blogpost prior to publishing (and for generally being awesome to the entire .NET community).